Are you drawn to watercolour painting but find it slightly daunting? Our simple and enjoyable craft of coffee filter painting may be the perfect place to start! It lets you experiment with watercolour effects without needing expensive supplies.
Why is Coffee Filter Painting Special?
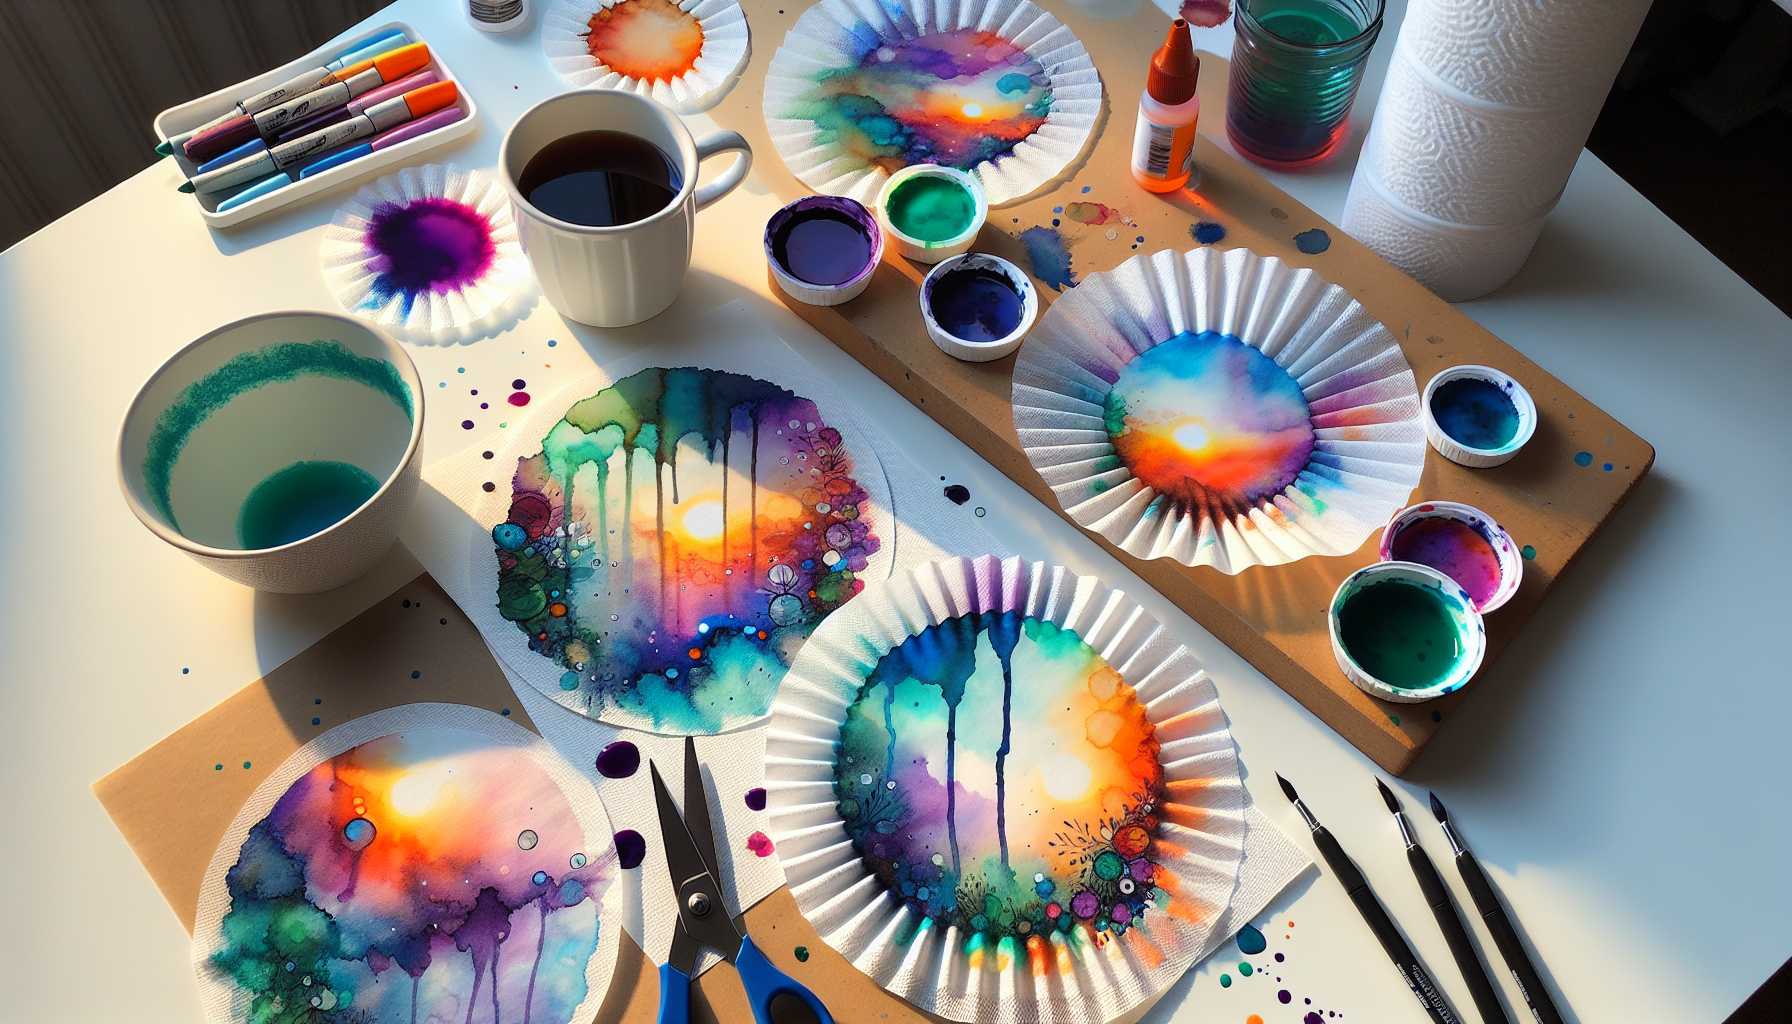
Coffee filters are unexpectedly perfect for these art projects. Their absorbent nature allows them to capture paint gracefully, creating organic, changing patterns. The lightweight paper enables the blending of colours naturally, mimicking the charm of watercolour paintings.
The best part is that you probably already have coffee filters at home. There’s no requirement to invest in expensive watercolour paper or stress about mistakes made on costly materials.
What Materials Do You Need for Coffee Filter Painting?
To get started you’ll need:
- Round coffee filters (preferably white)
- Washable markers or food colouring
- Water in small proportions
- Eye droppers or spray bottles
- Paper towels
- Flat space for drying
Most of the above items are likely to be found in your home already, and if you don’t have eye droppers, a small spoon will do the job just fine.
How to Paint with Coffee Filters: A Step-By-Step Guide
Step 1: Preparing Your Workstation
Begin by arranging your coffee filters on a flat surface with paper towels beneath to catch any drips. This simple setup helps keep your area clean and makes cleaning up easier.
Step 2: Introducing Colour
Choose two or three colours that combine well. Blues and greens can evoke images of the ocean. Reds and oranges create beautiful sunsets while purple and pink combinations are often crowd favourites.
Use your washable markers to add dots or small streaks of colour to your coffee filter. Don’t stress about achieving perfection, the magic happens when water touches the ink.
Step 3: Creating the Watercolour Effect
Here comes the fun part! Using your eye dropper or spray bottle, add small drops of water to the coloured areas. Watch as the water spreads and mixes the colours on the filter.
Each drop creates unpredictable yet unique patterns that you wouldn’t have thought of otherwise.
Advanced Coffee Filter Painting Techniques
The Folding Method
Before adding colour, try folding your coffee filter in half and then once again. Add your chosen colours to different sections of the folded filter.
Once you unroll it after adding water, you’ll discover symmetrical designs. This technique gives insight into creating elaborate and sophisticated mandala-like patterns.
The Color Bleeding Technique
For impressive colour bleeding effects, apply the marker ink heavily in one area. Then, drop water gradually and watch the colour travel across the entire filter. Darker colours such as purple, blue, or black work exceptionally well for this technique.
The Multiple Layer Technique
Allow the first layer to dry thoroughly before adding another layer of colour and water in different areas. This technique brings depth and intricacy to your final artwork.
Possible Usage of Your Coffee Filter Art
For Home Decor
You can use the completed coffee filter paintings as beautiful decoration pieces for your windows. The sunlight streaming through them creates an exquisite stained-glass effect.
You can either tape them onto windows or hang them from strings to fashion a colourful panorama.
As Personalised Gifts
Transform your artwork into greeting cards. Cut them to the right size and stick them onto cardstock. The recipients of these handmade treasures are sure to be impressed.
As Children’s Room Decor
Framing different coffee filter paintings together can create an instant gallery wall, adding a special touch to a child’s room.
For Seasonal Decor
Use relevant colours to represent different seasons. Orange and red filters can represent autumn leaves, while light blues and whites can mirror winter snowflakes.
Tips for Successful Coffee Filter Painting
Choosing the Correct Markers
Washable markers are best as their ink spreads easily when mixed with water. Permanent markers resist water and won’t give the desired fluid effects.
Crayola markers are a dependable choice that most people have at home.
Controlling the Amount of Water
Start with adding only a few drops of water. You always have the option to add more, but once the filter is drenched, there’s no going back.
Overloading the filter with water can lead to tears in the filter or could cause the colours to blend haphazardly.
Experimenting with Timing
Try adding water immediately after applying colours for gentle, understated effects or allow the marker ink to dry for a few minutes before adding water for more defined spreading.
Experimenting with timing can drastically change the outcome using the same set of colours.
Common Mistakes to Avoid While Coffee Filter Painting
Avoid Overcolouring
Applying too much marker ink can overwhelm the delicate coffee filter paper. Gentle, soft colouring tends to produce more refined results.
Don’t Rush
Practising coffee filter painting is meant to be a relaxing and mindful exercise. Enjoy the slow addition of each water drop and watch as the colours blend and spread.
Remember to Protect Your Workspace
Remember to have something beneath your filters. The ink and water will seep through and potentially stain your work surface.
Engaging Kids in Coffee Filter Painting
This craft is ideal for children. It’s safe, relatively mess-free, and produces results that would fill any kid with pride about their artwork.
Younger kids can hone their fine motor skills with the eye dropper, whereas older kids can experiment with colour theory and pattern creation.
Everyone remains intrigued by the unpredictable nature of the spreading colours.
Troubleshooting Your Coffee Filter Art
Unwanted Muddy Appearance
This commonly happens when too many colours combine together in the middle of the filter. Try keeping the colours separated somewhat in your next attempt.
In case of Tearing
Coffee filters are quite delicate when wet. Try using less water or gentle handling when working with wet filters.
Poor Colour Spread
Your markers may not be washable or maybe you need more water. Try adding another drop or two to encourage colour spreading.
Experimentwith Your Learned Skills
After you’ve mastered the basics of coffee filter painting, you may want to experiment with similar techniques. You can use the same method on paper towels for different textures.
Try sprinkling salt on wet paint for an interesting crystalline effect or using liquid watercolours instead of markers for more vibrant colours.
Why Coffee Filter Painting Works So Well
The magic is all in the functionality of the coffee filter. These conduits are designed to allow the flow of liquid while trapping tiny particles, the same properties that make them perfect for watercolour effects.
The thin, absorbent paper creates the perfect surface for the paint to flow, blend and create something truly unique. Professional watercolour paper works the same way, albeit at a low cost.
Handling and Protection of Your Artwork
Let your coffee filter paintings dry thoroughly before you handle them. This could take anywhere from 30 minutes to an hour, depending on how much water you’ve used.
Store flat pieces between sheets of paper to avoid creasing. If you want to keep them for a long time, consider laminating your preferred ones.
The Soothing Advantages of Coffee Filter Painting
The activity of coffee filter painting is extremely relaxing to many. Watching colours merge and flow can be meditative, providing relief from stress.
There’s no pressure to create something predefined. The unpredictable nature means you can’t really make mistakes, just unexpected outcomes that often turn out better than expected.
This makes coffee filter painting perfectly suited for anyone who feels apprehensive about traditional art projects.
In Closing
Coffee filter painting is proof that creating beautiful artwork doesn’t require hefty investment or extensive training. With just a few basic household supplies, you can create stunning watercolour effects that may rival much complicated techniques.
Whether you’re searching for a rainy day activity, a fun project for kids or a new way to unwind and engage your creativity, coffee filter painting delivers. The combination of simplicity with beautiful results makes this craft a hit among artists of all ages and skill levels.
So, pick up those coffee filters and start your artwork! You’ll probably be surprised at the beautiful art you are capable of producing with such simple items.